Mastering the Emergency Stop: A Step-by-Step Guide to Halting Safely
Introduction
An emergency stop—the abrupt bringing of your vehicle to a complete halt—can be the difference between avoiding a collision or suffering severe consequences. Whether you’re faced with a pedestrian darting into the road, sudden debris ahead, or an unexpected brake from the car in front, executing a controlled, efficient emergency stop is a critical defensive-driving skill. In this guide, we’ll break down the correct procedure for an emergency stop, explore the biomechanics of braking, and share practice drills to build the muscle memory you need. By the end, you’ll have the confidence and technique to react decisively and keep you and your passengers safe when every fraction of a second counts.

Understanding Why Emergency Stops Matter
Before diving into the “how,” it helps to grasp the “why”:
- Reduced stopping distance: Proper technique maximizes braking force, cutting stopping distance by up to 30%.
- Control and stability: Coordinated braking prevents wheel lockup (or minimizes it with ABS), keeping you in control.
- Predictable response: A standardized procedure eliminates hesitation and guesswork under stress.
Expert Insight:
“In an emergency, human reaction times average 1.2–1.5 seconds. Practicing your stop technique ensures that when you hit the brakes, you apply maximum force without sacrificing control.”
— Sarah Lin, Defensive Driving Instructor
The Four Phases of an Emergency Stop
An emergency stop unfolds in four distinct phases:
- Perception: Spotting the hazard.
- Decision: Committing to brake.
- Reaction: Initiating the brake.
- Braking: Applying and modulating brake force.
1. Phase 1: Perception
- Scan ahead: Constantly sweep the road 12–15 seconds in front of you (roughly a quarter-mile at highway speeds).
- Identify hazards: Look for brake lights, crosswalks, animals, debris, or erratic drivers.
2. Phase 2: Decision
- Commit immediately: Once you recognize a genuine threat, decide to stop—don’t second-guess.
- Verbal cue: Mentally (or aloud) say “STOP!” to override hesitation.
3. Phase 3: Reaction
- Foot transfer: Quickly move your right foot from the accelerator to the brake pedal.
- Heel pivot: Keep your heel anchored on the floor and pivot, rather than lifting your foot entirely.
4. Phase 4: Braking
- Progressive force: Squeeze the brake pedal firmly—apply 70–100% of your pedal capacity.
- ABS modulation: If your car has an Anti-lock Braking System, maintain continuous, firm pressure. You’ll feel pulsation; that’s normal.
- Threshold braking (non-ABS cars): Pump the brakes rapidly—hard press, release slightly, re-press—to avoid wheel lockup.
Analogy: Think of braking like parachute deployment—the faster and more decisively you pull the ripcord (brake), the sooner the chute (tires gripping the road) opens to slow you down.
Step-by-Step Emergency Stop Technique
H2: Preparing the Vehicle
- Footwear: Wear shoes with a firm sole—no flip-flops.
- Pedal familiarity: Know exactly where your brake and accelerator are positioned.
- Seating position: Sit upright, with your right heel lightly touching the floor in front of the brake.

H2: Executing the Stop
- Spot the hazard and think “stop.”
- Heel pivot: Without lifting your foot, pivot your heel from the throttle to the brake.
- Firm, continuous pressure: Press the brake pedal down decisively and hold.
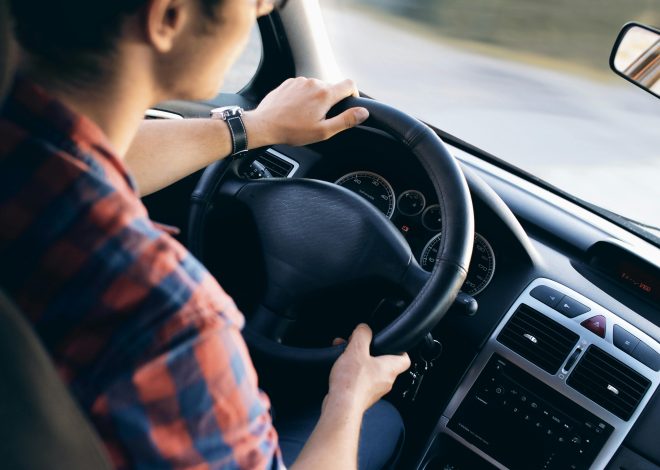
- Steering control: Grip the wheel at “9 and 3” or “8 and 4” to maintain directional stability.
- Clutch control (manual cars): If traveling under 15 mph, press the clutch just before full stop to prevent stalling.
Tip: In an ABS-equipped car, avoid pumping the brakes—ABS does that for you.
H2: After the Stop
- Shift to Park/Neutral: Engage park (or neutral + handbrake in manuals).
- Hazard lights: Turn on to warn following drivers.
- Assess the scene: Check mirrors, reset your mental model, and proceed only when safe.
Practicing Emergency Stops: Drills and Tips
H3: Controlled Environment Drills
- Empty parking lot: At 20, 30, and 40 mph, practice full stops—mark start and stop points with cones.
- Vary conditions: Try in light rain or on gravel (if safe) to experience reduced traction.
H3: Building Muscle Memory
- Repetition: Aim for at least 5–10 full-stop drills per practice session.
- Focus on footwork: Heel pivot and pedal feel until the motion is reflexive.
Real-Life Example:
John, a ride-share driver, credits emergency-stop drills in a vacant lot with avoiding a collision when a car swerved into his lane. “My foot just went down without thinking,” he recalls. “It was like slow motion.”
Common Mistakes and How to Avoid Them
| Mistake | Consequence | Correction |
|---|---|---|
| Grabbing the brake abruptly | Wheel lockup (non-ABS) / skid | Use progressive, firm pressure |
| Lifting heel off the floor | Slow transition; wasted reflex time | Heel pivot technique |
| Pumping ABS brakes manually | Reduces ABS effectiveness | Hold steady pressure in ABS cars |
| Leaning back or grasping wheel | Reduced steering control | Maintain upright posture, proper grip |
| Delayed decision (“wait-and-see”) | Increases stopping distance | Commit decisively when hazard spotted |
Advanced Considerations
Emergency Stops on Slippery Surfaces
- Ice or snow: Brake threshold decreases by up to 80%. Begin with lighter pressure to avoid lockup, then modulate.
- Rain: Watch for hydroplaning—if you feel a “floating” sensation, ease off brake slightly and reapply gently.
Handling ABS Feedback
- Pulsation sensation: You’ll feel rapid “thumping” under your foot—that’s ABS pumping for you.
- No release: Keep your foot firmly on the pedal until the car fully stops.

Conclusion
An emergency stop is more than a reflex—it’s a skill that requires understanding, practice, and nerve. By mastering the four phases (Perception, Decision, Reaction, Braking), honing the heel-pivot technique, and drilling regularly in safe environments, you’ll minimize reaction times and stopping distances when it matters most. Remember to adapt for road conditions, leverage ABS technology correctly, and maintain composure under pressure. With these techniques ingrained, you’ll not only protect yourself and your passengers but also contribute to safer roads for everyone.


